


 简体中文
简体中文
 English
 Français
 Español
 Deutsch
 Italiano
 日本語
日本語 繁體中文
繁體中文
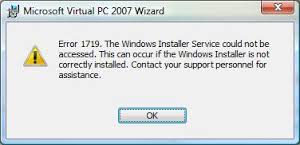
When you try to install a program in your computer, you may receive the following error message:
Here are some solutions for you to fix Windows Installer error 1719:
One Start the Windows Installer Service
To start the Windows Installer Service, do these steps:
To check that the Windows Installer Service is running, do these steps:
1.Click Start, enter services.msc in the Search box, and then choose Services under the Programs heading.
2.Right-click Windows Installer in the Services (Local) list, and then click Properties.
3.In the Startup enter drop-down list, check that the value is set to Manual.
4.If the Service status: entryis set to Running, the Windows Installer Service is running
Two Uninstall the earlier versions of the application that you want to install
If an earlier version of the application that you want to install is already installed on the computer, try these steps:
1.Click Start, choose Control Panel, and then click Uninstall a Program under Programs.
2.Choose the program in the list that you want to install.
3.Click Uninstall (or Uninstall/Change in Windows Vista), and then follow the instructions to uninstall the program .
4.Restart your computer.
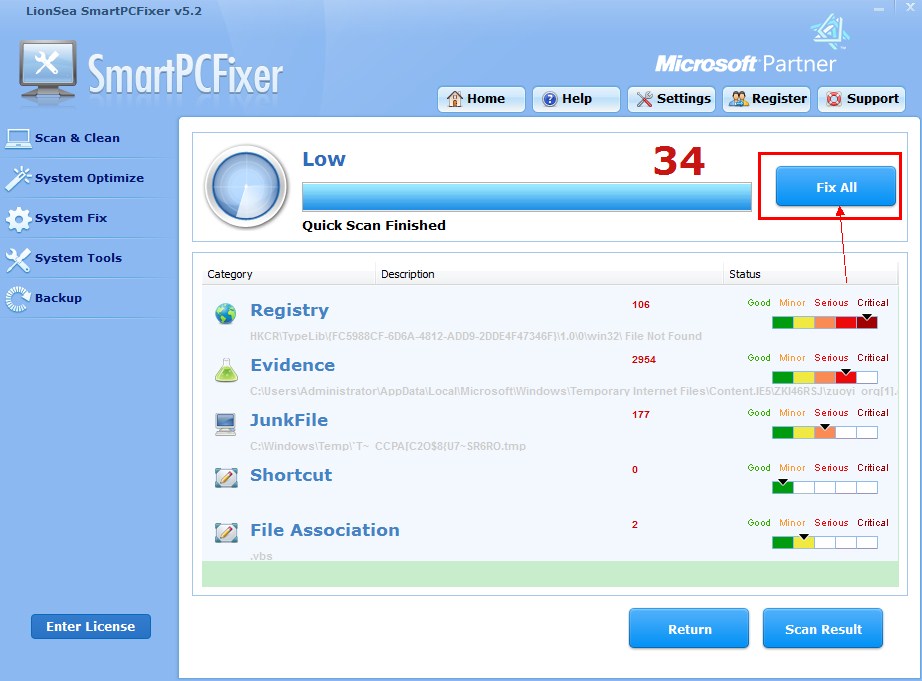
Three Fix Windows Installer Error 1719 with SmartPCFixer
"The Windows Installer Service could not be accessed"
Here are some solutions for you to fix Windows Installer error 1719:
One Start the Windows Installer Service
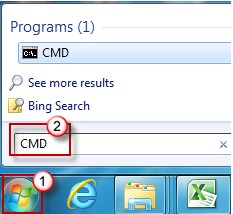
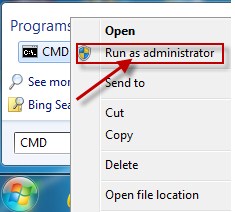
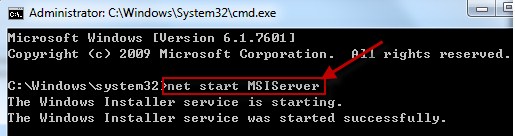
To start the Windows Installer Service, do these steps:
1.Click Start, and then enter CMD in the Search programs and files window.
2.Right-click cmd.exe, and then choose Run as Administrator.
3.Enter net start MSIServer, and then click ENTER.
To check that the Windows Installer Service is running, do these steps:
1.Click Start, enter services.msc in the Search box, and then choose Services under the Programs heading.
2.Right-click Windows Installer in the Services (Local) list, and then click Properties.
3.In the Startup enter drop-down list, check that the value is set to Manual.
4.If the Service status: entryis set to Running, the Windows Installer Service is running
Two Uninstall the earlier versions of the application that you want to install
If an earlier version of the application that you want to install is already installed on the computer, try these steps:
1.Click Start, choose Control Panel, and then click Uninstall a Program under Programs.
2.Choose the program in the list that you want to install.
3.Click Uninstall (or Uninstall/Change in Windows Vista), and then follow the instructions to uninstall the program .
4.Restart your computer.
5.Restart the installation process for the application that you want to install.

Three Fix Windows Installer Error 1719 with SmartPCFixer
In fact, you just need a software that can help you identify and fix various computer issues automatically. It greatly saves your time and improves your productivity, so you have more time for leisure. Download it from here:
http://www.smartpcfixer.com/download/setup.exe
Follow Us
Knowledge Base